Upgrading the RAM in a WRT54Gv2
This project is specific to the rev 2 hardware, due to Linksys converting the routers from SDRAM to DDR RAM at some point (Probably the G/GL split?). It is certainly possible with newer versions, but requires different chips and nvram parameters. Obviously, this means that with the addition of a new flash chip (which you’d need a JTAG cable to debrick), you could probably convert a WRT54Gv8 into a WRT54GL…
In any case, I would generally NOT recommend trying this. On my previous attempt, I managed to lift solder pads like hookers in Reno, which if you’re lucky, you can recover from with jumper wires, but one of the pads I lost went under the chip to a via to the other side, and routing a data line on RAM the long way around doesn’t really work…
What I did was to first replace the two 64Mbit RAM chips in my Wifi router with chips twice as big, and then very carefully modified the settings in the nvram to configure the router to try and use the extra 16MB of RAM, giving me way more than the 16MB the firmware is expecting, giving me quite a bit more extra space to do as I please with. SDRAM inherently requires the same number of address lines regardless of the density, so getting 64MB of RAM on here may be theoretically possible as well…
This unfortunately doesn’t upgrade the 4MB of FLASH storage this router comes with, but in addition to being able to wire an SD card to the GPIO lines on the controller, I am exploring the option of upgrading the FLASH chip on-board, and will let you know how that goes in the future. As it stands, it leaves me with 1MB of JFFS2 storage to play with, which is enough for pretty much anything I’m personally going to write in C or SH, and maybe even an NFS driver, but it’s the challenge, right?
First thing first is to find a suitable pair of 128Mbit SDRAM chips in 54-TSOP-II packages. The most common source for these are old RAM sticks, but I didn’t have any around, and felt that that was fighting a little too far uphill. By luck, I got a call from an Arrow sales rep last week, and decided to look through their catalog to see if I could find the parts I needed for a few of these more obscure projects. It turns out they did have some parts in stock, that they’d sell to me for less than $6 a piece or lots of 1,500. As for the rest of their selection, they certainly won’t replace Digikey, clearly being focused more on production run type stuff, and not the random gizmos I generally order from Digikey.
The part I ordered was the IS42S16800D-7TL (datasheet) (No deep links in Arrow’s catalog?), at $2.90 a piece, plus a $0.99 “energy fee.” This fee made more sense when I got it in the mail, and they had been so kind as to load my pair of chips in a full TSOP tray, and triple wrap it in bubble wrap and perf paper…

Once I had replacement chips in hand, the hard part was afoot. To remove the old chips, and solder on the new chips, all while not damaging the motherboard to a state beyond repair.
Removing the old chips is the challenging part, but once I figured out to use my mini-blowtorch as a pseudo-hot air gun, it was as simple as use a dental pick to apply slight pressure, and just keep brushing the pins lightly with flame until it all just instantly melted and came off.

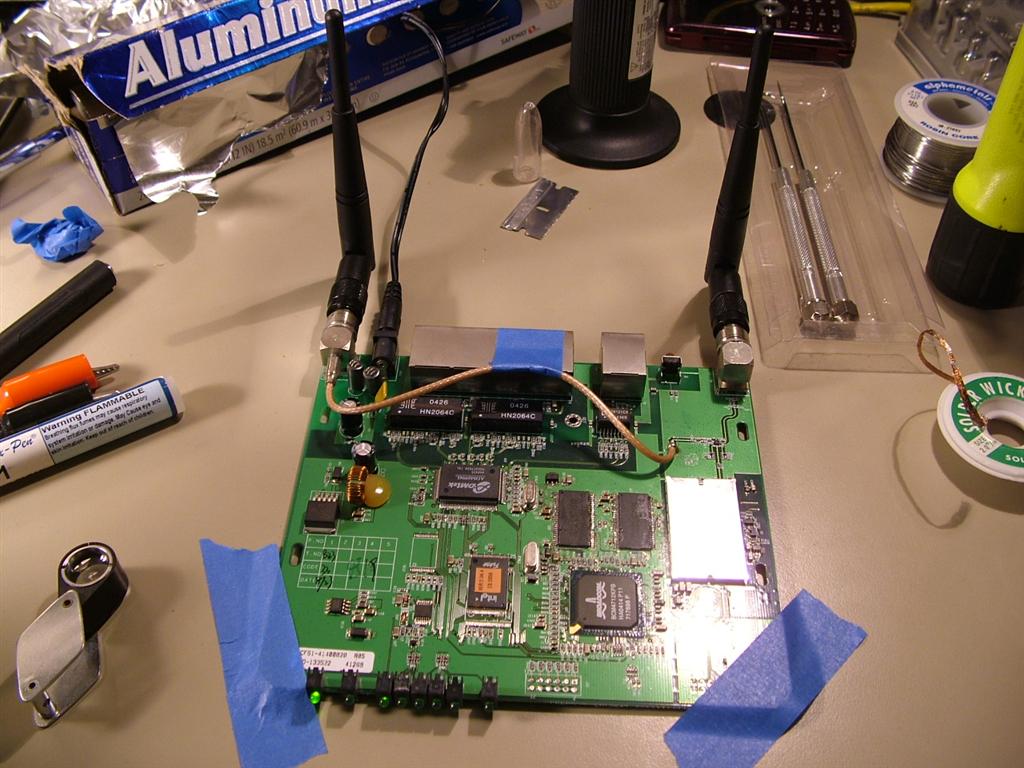
I used aluminum foil to protect the coax running to the second antenna while using the torch, having had a bad experience trying to solder coax onto 3/4” copper pipe in the past…
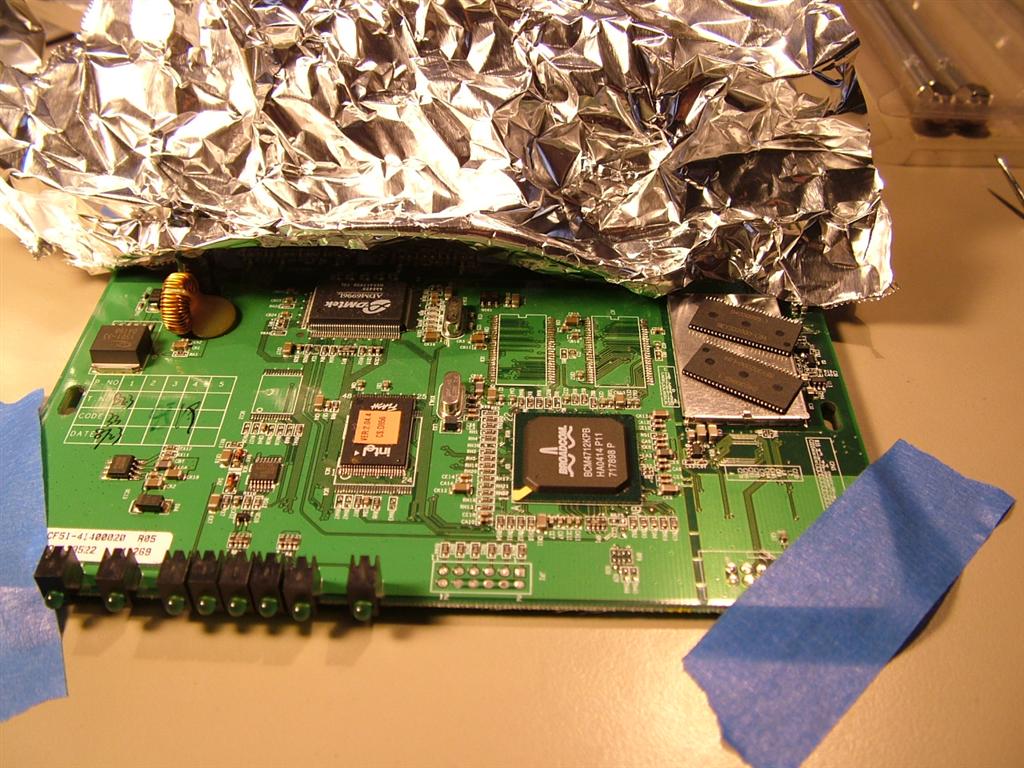
Once the old chips were off, clean up the pads a little and apply flux liberally (like, use a lot. If you think you’re using enough, add more; you’re not). This picture is before I cleaned the pads, having just removed the old chips:
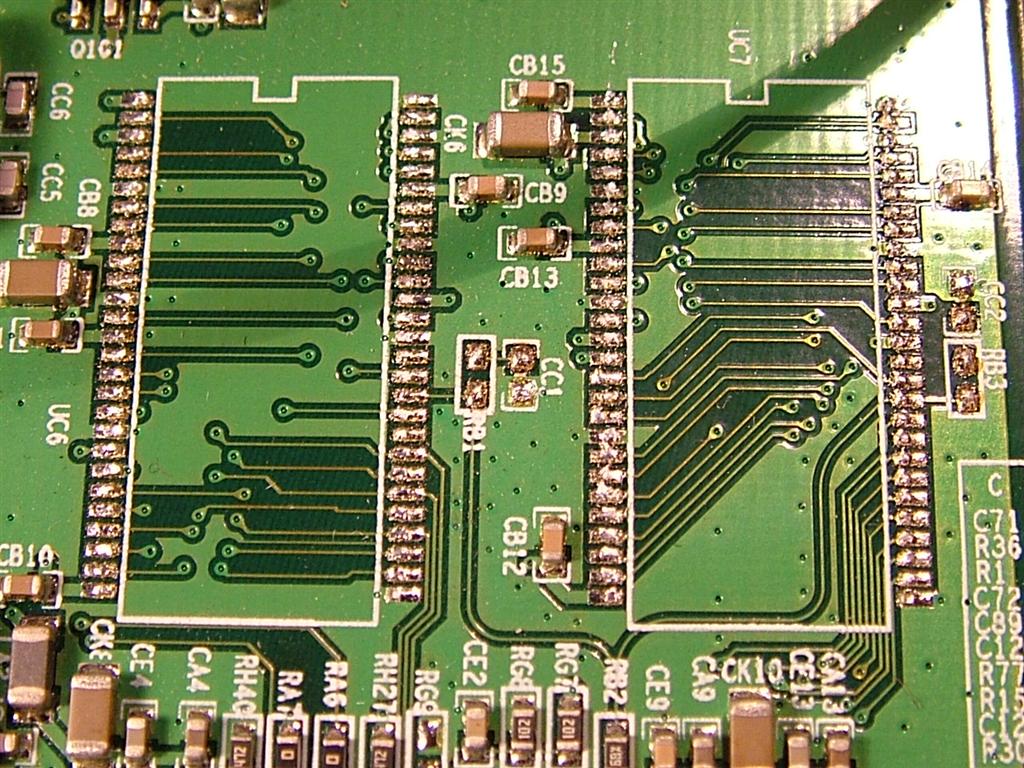
Soldering on the new chips is pretty standard surface mount technique. Flux, line up the chip, tack two opposite corners, check alignment, flux, drag solder along the pins, flux, solder wick / reflow until the bridges are all gone, use a multimeter and 30x loop to check all of the pins to try and find shorts and opens before the smoke test.

Ain’t that solderin’ perdy? This was before cleaning up the chips and board a little bit with a Q-tip to remove the flux. The second from bottom pad on the far right column did lift, but I managed to caress it back in place enough to work. GENTLE! You must be GENTLE with pads on commercial PCBs! These things weren’t made by LadyAda.
Having finished the hardware problem, it’s just software from here on out. Power it up and check to make sure that it still works. If not, hope that you can go back in and fix it, and that you haven’t damaged anything. Once that’s checked, it’s time to change the memory controller settings. Of course, I’m already running Tomato on it, so this is as simple as opening an SSH session with the router, and running the following commands [NOTE: These are different depending on hardware revision!]:
nvram set sdram_init=0x008
nvram set sdram_ncdl=0x000
nvram commit
reboot
- The first line tells the brcm controller to use a 9-bit column width instead of an 8-bit column, to address the extra 16MB of RAM.
- The second line clears the ncdl tuning information, forcing the CFE bootloader to calibrate new timing values for the new RAM the next time it runs.
- The third line actually writes these values to the nvram.
- Now, the forth line is a little confusing, but if you read the man page and --help carefully enough, you might be able to figure out what that command does.
- Useful links: [DD-WRT forum post] [BCM3302 memory controller config registers tables]
Once the router comes back up (hopefully), you’ll be the proud owner of a router with plenty of extra RAM, and the pride that you upgraded it yourself (but really, I wouldn’t recommend trying this, unless you really aren’t that big of a fan of your WRT to begin with.).
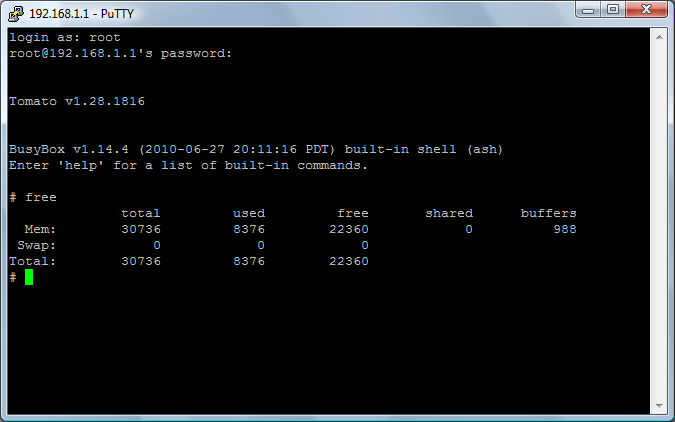
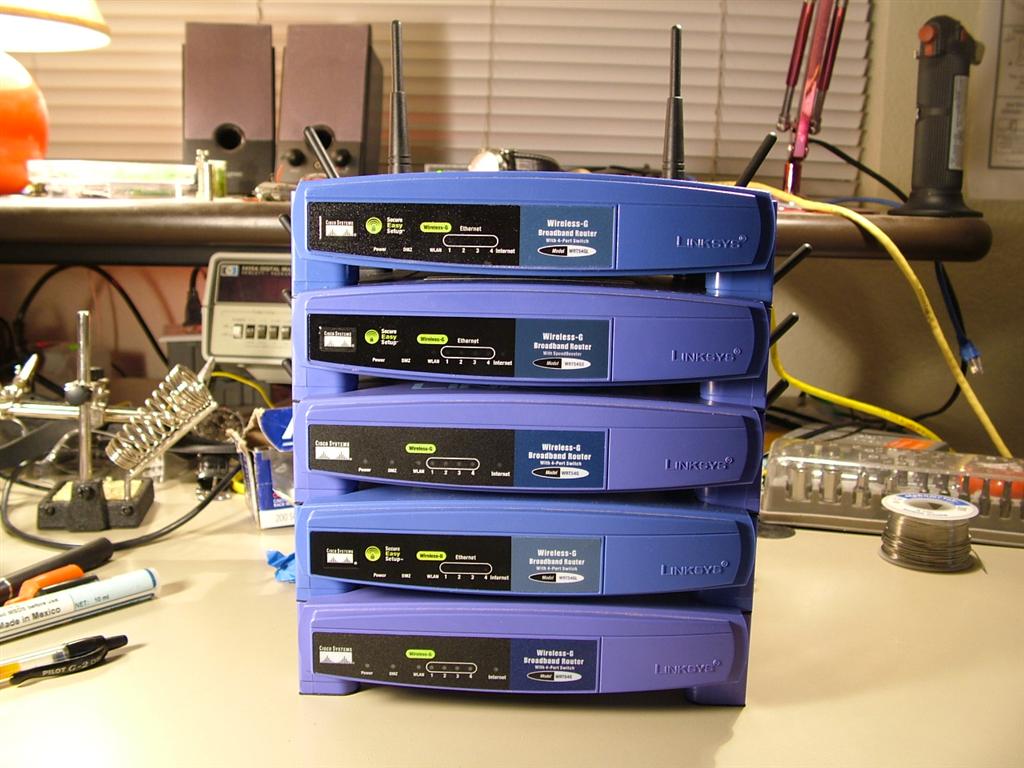
Yay! 22.36MB of free RAM! So much potential! On a related topic, I’m developing quite a WRT54G problem… Luckily I only bought one of them retail, having gotten the rest for decent prices on eBay, and RIDICULOUSLY good prices ($20) at swap meets.
Anyone want to send me a free WRT54Gv8 to see if I can convert it to a GL?