Building a Storage Shelf for All My Digital Storage
I've been using a Synology DS1813+ NAS (modern equivalent is the DS1819) in my apartment for the last few years since one of my friends gave it to me. It's a little pricey, but if this one rolled over and died, I would definitely replace it with another; once you stop wanting to spend your time mucking with the infrastructure in your life, the "just works" experience of the Synology is pretty attractive.
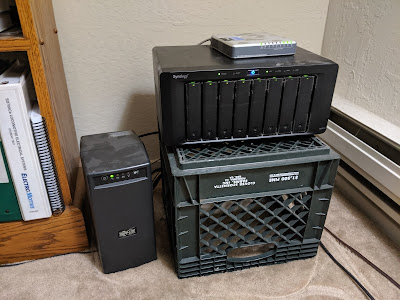
Unfortunately, what hasn't been very attractive is the dusty corner it's been living in. I finally got tired of blowing the dust out of it regularly and at least stood it up on a milk crate, but this could be improved. At the same time, my apartment has been slowly collecting other spare hard drives on various horizontal surfaces, as leftovers from various different projects and the like.
So I decided this would make for another good woodworking project this summer, so I decided to make a storage shelf... for my storage media... it's a storage shelf.
Might I saw, this turned out pretty gorgeous. It was made from about a third of a sheet of 3/4" AB grade plywood with a red oak veneer on it. All of the joints were fairly regular rabbet or dado joints cut to fit the mating piece of plywood. The left shelf was specifically sized to fit my UPS, which I do regret a little since I didn't consider how warm it would get in such a tight space, and the right two shelves were sized specifically to hold two rows of 3.5" hard drives, so the shelf can hold 28 cold drives, in addition to the eight drives running in the Synology itself. (For those wondering, I'm running it with 7x4TB drives in RAID6, and a 128GB SSD read cache drive in the 8th bay)
The finish was three coats of semi-gloss polyurethane, which took longer than the actual wood cutting since you need to let each coat dry and re-sand it again with something fine like 400 grit for the next coat, and I could only work on this the few days I dropped by my parent's house to work in the woodshop and also wasn't creating dust.
Over all, it ended up taking about six weeks to get it all the way from concept to finished. I was tweeting about it and my other various projects quite a bit on my Twitter, which has really been my outlet for a lot of these sorts of posts lately.


