Installing AlmaLinux Over the Network With No Hands
As part of a broader project, I’ve been working on setting up the infrastructure to be able to power on new servers, have them boot over the network to download and run the complete Linux installation process, and then reboot into the freshly provisioned operating system with zero human interaction. This ability to fully reinstall the entire OS on any new (or replaced) hardware is a big win for servicability when you want to be able to freely add more servers, swap servers, wipe servers and reprovision them, or replace failed hard drives in a server and have it fully recover autonomously. I originally solved this problem a few years ago as part of the MicroMirror project, where I shipped each free software download mirror appliance with a recovery ROM on a USB flash drive plugged into the internal USB port on the motherboard of each system (which I still need to document), but this is a partially different problem than what I am trying to solve here, which is booting not off a load USB drive but completely over the network using nothing but the firmware and wherewithal baked into the hardware itself.
Zero touch installation of Linux always feels like a sort of holy grail acheivement to me; there is an overwhelming field of a problem space to deal with and frustrating little documentation that’s useful or up to date. So I’m not going to solve the problem here that hands off Linux installation seems like a closely protected dark art, but I am going to write down my opinionated set of steps I’m following for this one specific project setup in the year 2026, so while this article will very likely not be specifically useful to the reader’s objective or shelf stable enough to be useful to you in the future, this is what I did.
As part of this large problem surface area, I’ve had to make numerous assumptions here about the reader and the environment to keep this article shorter than an entire textbook on the matter of pre-OS automation:
-
The reader is vaguely familar with the firmware to bootloader to OS chain of control when you power on a computer. Things like “opening the boot menu and selecting the UEFI PXE boot option” and setting up a DHCP, TFTP, and HTTP servers are assumed to be in the readers’ wheelhouse or solvable using documentation elsewhere on the Internet.
-
We only care about UEFI PXE booting over IPv4. Legacy PXE booting can be essentially the same, with plenty of caveats about the limitations of fewer supported features and broader history of vendors just doing whatever they like during the pre-OS stage. IPv6 is a hellscape of the IETF’s own making simply because they made DHCP… optional?
-
I used TFTP for the bootloader stage not because it’s what I ultimately want to be using to serve the iPXE boot image to the hosts (HTTP), but because this was the most expedient way to offer a network boot option to hosts using the branded OpenWRT travel router on my kitchen table.
-
For the proof of concept I have everything wide open, so anyone with access to the network would be able to access the kickstart files for each host. This seems fine to me (I don’t see anything particularly sensitive about my password hashes or what drive partitions I’m using?), but I suspect I’ll ultimately lock down the provisioning process using IP ACLs. There are ideal ways to lock down this sort of process using a certificate authority and your own whole PKI to authenticate each client to the provisioning server and authenticate the provisioning server back to the clients, and this is all totally possible because I’ve seen it done, but life is short and this is a proof of concept.
-
We’re using
iPXEinstead of the more traditionalpxelinux.0chainloader to bridge between the PXE ROM to the Linux init environment because it felt slightly easier to bake a fixed boot option into iPXE, but honestly a bigger part of the decision was because the SYSLINUX website seemed to be down the evening I first sat down to build this. Both valid solutions that vary only in pretty much every detail possible.
So with that rough start to what is needed, let’s get into it.
High Level Sequence of Events
We’re looking to network boot a host here and install AlmaLinux on it without any human interaction. This is going to take several steps.
-
The host powers on, and selects the UEFI PXE ROM on the NIC as its boot device. I rely on this happening most of the time by either having a blank hard drive installed with no OS on it, or using the
efibootmgr -ncommand to set a one time boot option override for the next reboot. -
The PXE ROM on the NIC sends out a DHCP request, and the answer back from the DHCP server includes a next server address and filename (of our custom iPXE build) to download from that next server over TFTP. Modern UEFI PXE ROMs are much more flexible than traditional ROMs in that it’s not just limited to option 66/67 and it’s not limited to just TFTP, so it’s possible to give the client a full HTTP URL to where to download the bootloader instead of the classic TFTP transport.
-
The PXE ROM downloads the iPXE image over TFTP from the next-server and runs it.
-
When iPXE runs, it sees that it has a custom ipxe script embedded in the binary which tells it to download the AlmaLinux PXE kernel and initrd filesystem. iPXE also sends out a DHCP request to get an IP address, gateway, DNS server, etc to use for fetching assets and handing to the installer. The script finally generates a custom kickstart URL with the host’s MAC address in it, so you can use the same iPXE binary on multiple hosts and serve each of them a unique kickstart file to provision the host.
-
iPXE boots the downloaded kernel; passing it kernel parameters telling it all the IP addressing information iPXE got from DHCP, a URL to fetch the installation kickstart file from, and an AlmaLinux repository to use to download the installer disk image from.
-
The AlmaLinux PXE kernel and initrd gives the host enough of an environment to download the install IMG file for running the Anaconda installer from the repository passed from iPXE. Once Anaconda runs, it fetches the kickstart file and follows all of the parameters in that file to perform the OS install to a local disk without asking the user any questions.
-
The kickstart file calls out where to fetch all of the needed RPM packages for the install, what collection of software to install (i.e. Minimal vs Server vs a full desktop Workstation install), how to partition and mount the hard drive, usernames and passwords, and finally to reboot the system when done with the install.
-
The host selects booting from the local disk over using the PXE ROM again and boots from the fresh AlmaLinux install on the local disk.
PXE Network Environment
The main moving pieces on the network for enabling the PXE boot is that you need a DHCP server to offer options 66/67 to the client, a TFTP server to serve the iPXE binary, and a HTTP server to serve the kickstart file.
The easiest solution that I reach for when setting up the proof of concept here is any router running OpenWRT.
The advanced settings under DHCP allow you to enable TFTP on the router and specify a filename, so I ssh into the router, create a /root/tftp/ folder, and copy the iPXE binary into that folder.
For serving the kickstart files, I just throw them in the /www/ folder on the router, and have the embedded ipxe script pointed at the router’s web server for the kickstart file.
Building iPXE with an embedded script
iPXE is a project implementing a PXE bootrom, where it’s a tiny program with enough smarts to network boot a system. If you want to go absolutely ham on iPXE, there are ways to compile iPXE for specific network cards and burn the program into the flash of the NIC itself, but most modern systems have pretty effective PXE boot roms with them (or the ability to boot off a USB flash drive) so it tends to be easier to leave the hardware itself alone and have the host boot iPXE from an external source to then boot something else.
The build dependencies for iPXE are pretty basic (GCC, make, etc) and we just need to download the source code, copy in our custom ipxe boot script, and build it specifically for the x86 UEFI target to get the binary we need.
kenneth@kwflap3:~$ git clone https://github.com/ipxe/ipxe.git
Cloning into 'ipxe'...
remote: Enumerating objects: 68187, done.
remote: Counting objects: 100% (210/210), done.
remote: Compressing objects: 100% (128/128), done.
remote: Total 68187 (delta 119), reused 85 (delta 82), pack-reused 67977 (from 3)
Receiving objects: 100% (68187/68187), 22.69 MiB | 13.85 MiB/s, done.
Resolving deltas: 100% (51298/51298), done.
kenneth@kwflap3:~$ cd ipxe/src/
kenneth@kwflap3:~/ipxe/src$ vim almascript.ipxe
kenneth@kwflap3:~/ipxe/src$ make bin-x86_64-efi/ipxe.efi EMBED=almascript.ipxe
  [DEPS] crypto/certstore.c
  [DEPS] crypto/privkey.c
  [BUILD] bin-x86_64-efi/__divdi3.o
  [BUILD] bin-x86_64-efi/__divmoddi4.o
[... SNIP lots of building ...]
  [LD] bin-x86_64-efi/ipxe.efi.tmp
  [FINISH] bin-x86_64-efi/ipxe.efi
rm bin-x86_64-efi/version.ipxe.efi.o
kenneth@kwflap3:~/ipxe/src$ ls -l bin-x86_64-efi/ipxe.efi
-rw-r--r--. 1 kenneth kenneth 1111040 Jan 17 18:21 bin-x86_64-efi/ipxe.efi
The special config in the almascript.ipxe is what precludes us from just using the canned builds of iPXE, since it was easier to bake this into the binary than trying to convey the information elsewise.
#!ipxe

echo Zero Touch Alma Install!

# Have iPXE enable the boot network interface and request a DHCP lease
dhcp

# Copy over all the addressing info from iPXE's DHCP lease for the installer
set ipparam BOOTIF=${netX/mac} ip=${ip}::${gateway}:${netmask}:::none nameserver=${dns}
# Pick an Alma Repository for the init environment to download the installer from
set repo http://repo.almalinux.org/almalinux/9/BaseOS/x86_64/os/
# Set the install mode (which gets overridden by the kickstart file I guess)
set install_mode inst.graphical
# Point the installer at a kickstart URL that's composed from the MAC address of the boot interface
# This depends on where you're hosting the kickstart files and netX/mac gets replaced with each NICs mac
set ks_url http://10.33.1.1/kickstart-${netX/mac}.cfg

imgfree
kernel http://repo.almalinux.org/almalinux/9/BaseOS/x86_64/os/images/pxeboot/vmlinuz inst.repo=${repo} ${install_mode} inst.ks=${ks_url} ${ipparam}
initrd http://repo.almalinux.org/almalinux/9/BaseOS/x86_64/os/images/pxeboot/initrd.img

# Send it!
boot
So this yields you with a 1MB ipxe binary that has the logic baked into it to download the latest AlmaLinux9 kernel, and run it with a URL pointing to a kickstart file specific to each host’s MAC so you can reuse the same ipxe for all your hosts and then just have a folder of different kickstarts for configuring each host differently.
Kickstart File
Once the host has PXE’d the ipxe binary, which has fetched the stock AlmaLinux installation environment and passed it a bespoke kickstart URL, it’s up to that kickstart file to actually configure the host to suit the project’s needs. This is the part that can sink some of the largest amounts of time to try and get the kickstart file to actually execute all the desired setup steps. Even I’ve punted on all the prerequisites before and have been meaning to add support for setting passwordless sudo to my kickstart files to make for a seamless handoff between the kickstart and the ansible playbooks which come to follow.
One of the most useful sources of information on what goes into a kickstart file is the fact that when you click through the GUI, the results of that gets written to /root/anaconda-ks.cfg on every system, so that can give you some good tidbits to start with.
I’ve also spent a lot of time reading the RHEL 9 chapter 22 manual which documents each individual parameter with not a great amount of context but at least all of the syntax.
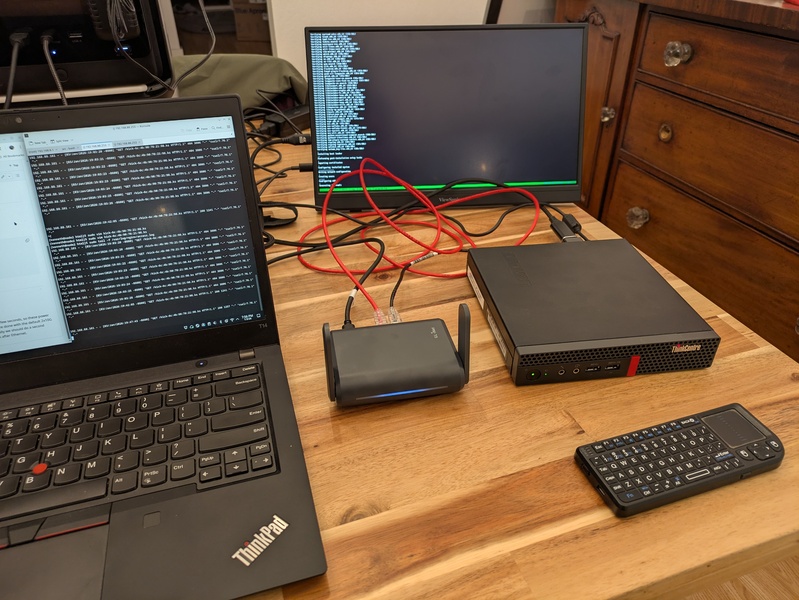
Despite the original photo showing my initial work happening with a little Lenovo 1L PC, the final target of this deployment is a fleet of Dell R220s, so here is the example of what the kickstart looks like that I’m using:
text
repo --name="AppStream" --baseurl=http://mirror.fcix.net/almalinux/9/AppStream/x86_64/os

%addon com_redhat_kdump --enable --reserve-mb='auto'

%end

# Keyboard layouts
keyboard --xlayouts='us'
# System language
lang en_US.UTF-8

# Network information specific to this host
network  --bootproto=static --device=wan0 --ip=192.0.2.2 --netmask=255.255.255.0 --gateway=192.0.2.1 --ipv6=2001:db8::103/64 --ipv6gateway=2001:db8::1 --nameserver=8.8.8.8,2606:4700:4700::1001,1.1.1.1 --activate --bondopts=mode=802.3ad,lacp_rate=fast,miimon=100,xmit_hash_policy=layer3+4 --bondslaves=enp1s0f0,enp1s0f1,eno1,eno2
network  --hostname=ztphostname

# Use network installation
url --url="http://mirror.fcix.net/almalinux/9/BaseOS/x86_64/os/"

%packages
@^minimal-environment

%end

# Run the Setup Agent on first boot
firstboot --enable

# Partition the specific drive for boot
ignoredisk --only-use=/dev/disk/by-path/pci-0000:00:1f.2-ata-1
# Partition clearing information
clearpart --all --initlabel --drives=/dev/disk/by-path/pci-0000:00:1f.2-ata-1
# Disk partitioning information
part swap --fstype="swap" --ondisk=/dev/disk/by-path/pci-0000:00:1f.2-ata-1 --size=2048
part /boot --fstype="xfs" --ondisk=/dev/disk/by-path/pci-0000:00:1f.2-ata-1 --size=1024
part /boot/efi --fstype="efi" --ondisk=/dev/disk/by-path/pci-0000:00:1f.2-ata-1 --size=600 --fsoptions="umask=0077,shortname=winnt"
part / --fstype="xfs" --ondisk=/dev/disk/by-path/pci-0000:00:1f.2-ata-1 --grow


# System timezone
timezone America/Los_Angeles --utc

#Root password
rootpw --lock
user --groups=wheel --name=kenneth --password=$6$coFqYm7F55j92I/r$fNsiXZALqT3aiuwsheNoBfKUiqSjmDgwMJVDQJmPxuBZD//0t.CQilyPyFsf7YRvuTN/wYL0ZQZS7ujoMcpbw. --iscrypted --gecos="kenneth"
sshkey --username=kenneth "ssh-ed25519 AAAAC3NzaC1lZDI1NTE5AAAAIAQ1MiF5sxqA+wsJStuzB0RyP2ZTw+Zej7y4DKygyG18 kenneth@node1"

reboot
The most notable parts of this kickstart that will be specific to each individual host is that I identified the network interface names and configured them into a link aggregation group with IP addresses assigned to it, and that I identified where the local drive’s SATA port is located in the PCI hierarchy and use that to specifically refer to the hard drive I want the OS installed on.
I will just leave you with the comment that dialing in kickstart files is an exercise in patience. You will not get it right on the first try, and you will have to handle the particulars of each different compute, so the appeal of buying the exactly same hardware for every host will readily become apparent.