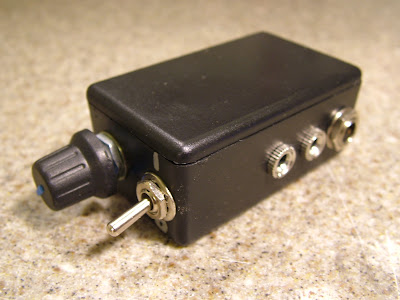
High Impedance "Ruby" Audio Amplifier
One of the enjoyable parts of the electronics hobby is the fact that, once you get the most basic set of tools, you're able to start building your own specialized equipment, depending on what direction you are then interested in taking the hobby. A perfect recent example of this is my rubidium frequency standard that I built for <$150 to test oscillator drift characteristics.
This quarter, I've been going on a "finally learn analog or bust" stint (which is one of the reasons why this blog has been so quiet), so one circuit that I found myself repeatedly breadboarding up has been a basic audio amplifier.
Audio amplifiers generally fall into two categories; power amplifiers, which just make a signal louder, and "preamplifiers," which are designed to only match impedance of a signal instead of power gain, to bring very small and low power signals from microphones or radio detectors up to a more manageable level. Since both of these types of amplifier are useful, I decided to build myself a small amplifier module based on the RunOffGroove Ruby design.
Schematic courtesy of runoffgroove.com
I made no significant changes to their design, other than substituting a fixed 1μF capacitor for the 1k gain pot, since I generally only need volume control, so I picked a single gain value (since the difference between gain and volume control is... nuanced...). You also normally power this circuit with a 9V battery, but I instead use a 2.1mm barrel jack since 2.1mmx5mm 12V is my standard project power connector.
Getting all of this to fit in a 60x35x25mm project box was challenging and a little tight, but possible.
The amplifier acts in two stages; the MPF102 JFET acts as a very high impedance voltage follower, to ensure that the amplifier doesn't load down whatever circuit it's amplifying (i.e. a small microphone). The JFET performs no voltage amplification, but only transforms the impedance to a lower value for the 10k volume pot and LM386 op-amp.
The LM386 makes up the second stage, which is where most of the power gain of this amplifier is had. The LM386 is a really convenient op-amp to use, because it is specifically designed for audio amplification. It has an internally set gain, which can be variably increased another order of magnitude by coupling together pins 1 and 8. On the output, the 220μF capacitor blocks DC from flowing through the speaker, and the series 10Ω resistor and 47nF capacitor to ground are a lag compensator to help stabilize the LM386 (which is notorious for "motorboating," where it breaks into oscillation) and remove higher pitch whine from whatever signal you're amplifying.
I've found this high impedance amplifier useful in a few projects already, and I think it's a nice little module to have in your toolbox. I also use it quite a bit for driving a large speaker from an MP3 player, using a 12.6V lead acid battery.


