Switching 120VAC With 5V Digital Logic
After building my glorified 2 outlet power strip for my switchless desk lamp, the natural next step is to build a switched outlet that can be electronically controlled. I separated the two outlets electrically, and connected them to opposite poles of the relay, so one of them is normally open, and one of them is normally closed, and they reverse when the relay is energized.
NOTE: It is important for me to be exceedingly clear that this is primarily meant as a prototyping device. The gang box is used as an enclosure, not because it’s meant to be installed in a wall, but because it’s the perfect sized enclosure. You are dealing with mixed high and low voltages here, so implement at your own risk.
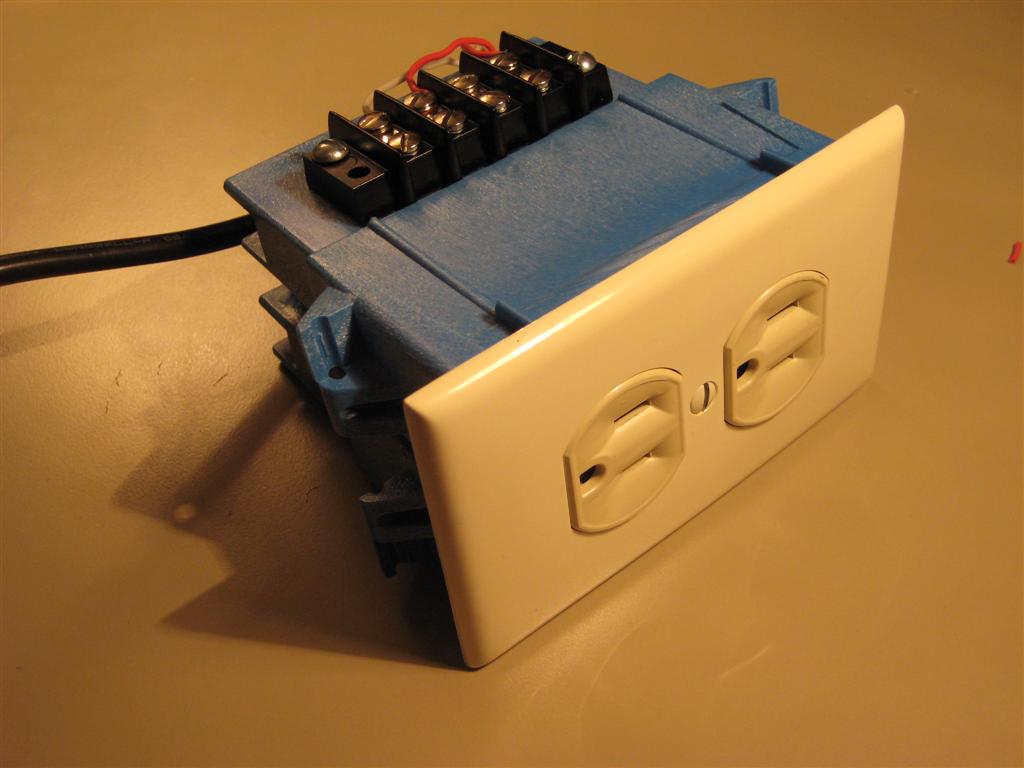
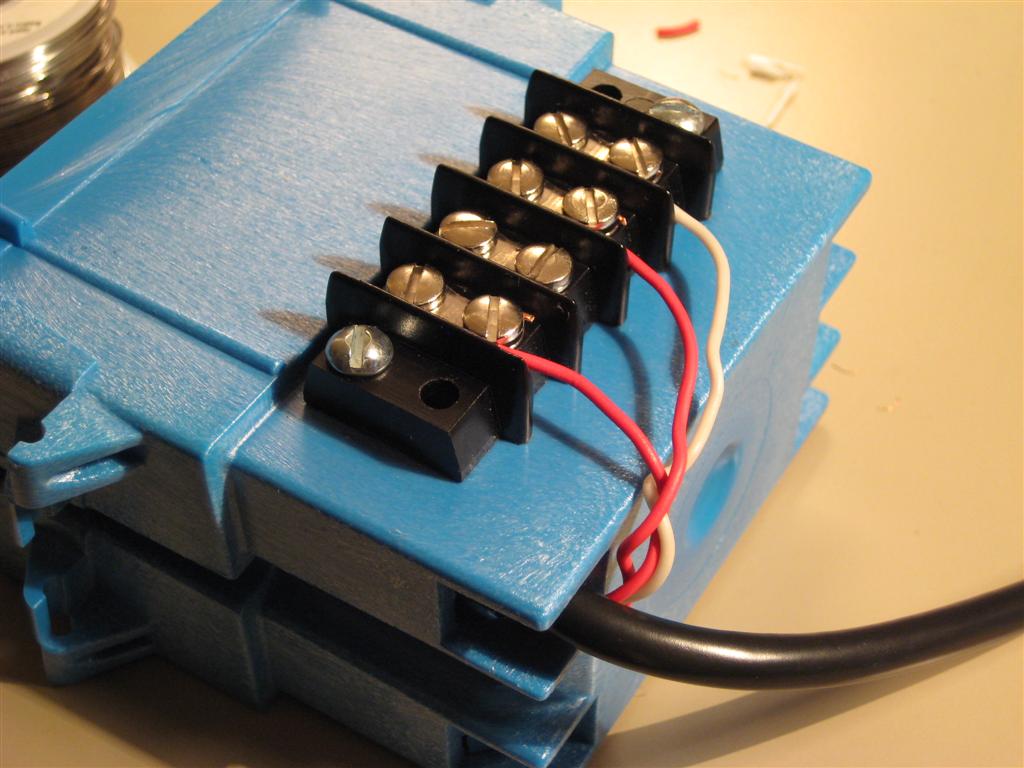
How it works is that it has a double-throw relay inside, which is controlled by the 5V logic connected to the terminal strip on the side of the junction box, and switches power between two separated outlets, so you can have either a positive output, or an inverted one, depending on what you’re doing with it.
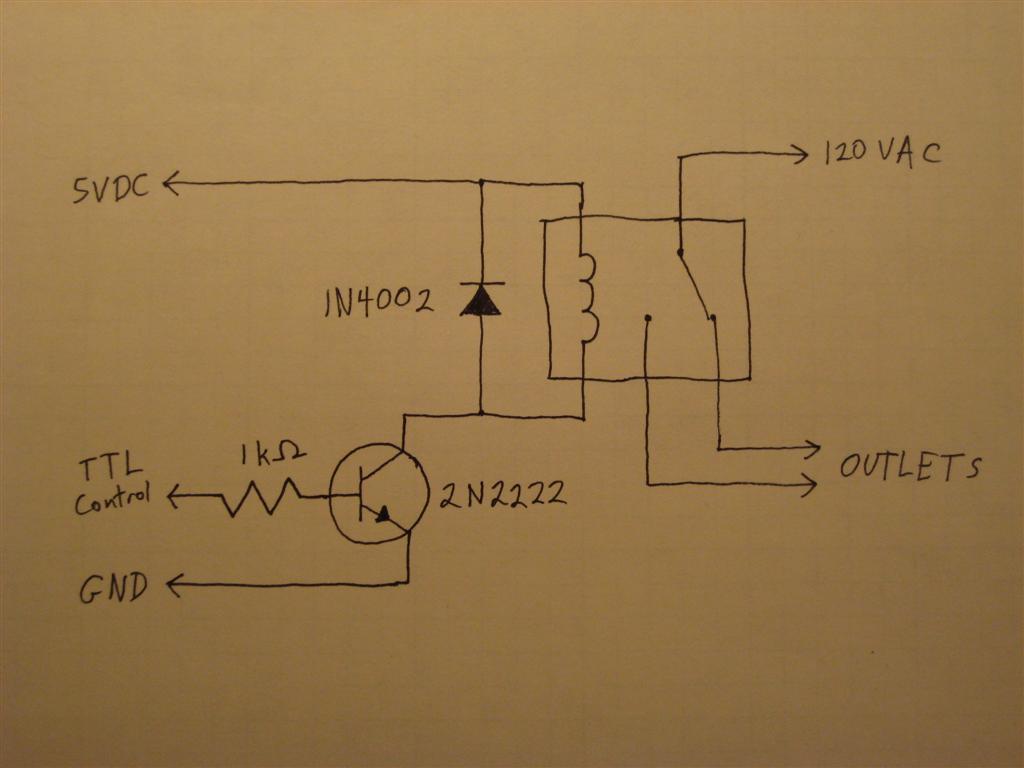
The three terminals are power, ground, and control. This is because the relay draws 65mA, which is much more than TTL logic is designed to drive, so I used a transistor, which only draws 4mA, to switch the higher current, which is sourced directly from the TTL power supply. The diode is called a freewheel or flyback diode, and is used to suppress the voltage spikes caused by the inductive nature of magnetic relays.
Parts list:
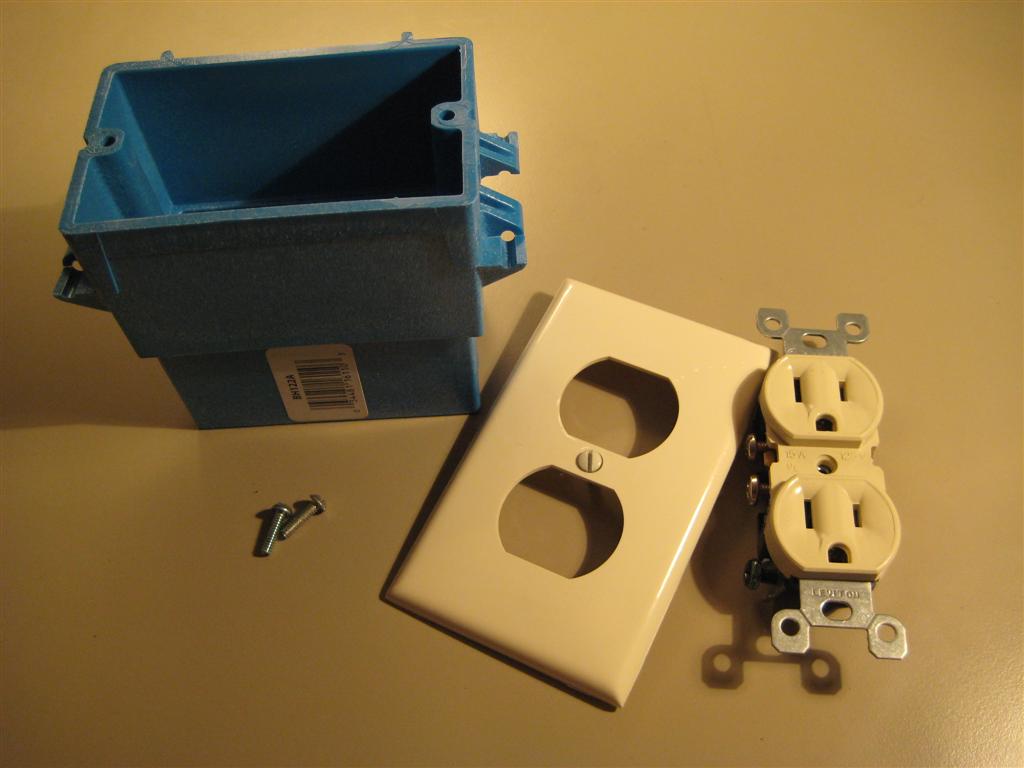
- Extra deep single gang junction box (approx 65 cents at hardware store)
- Duplex 120V outlet (Less than $1 at hardware store)
- Single gang cover plate, matching color of outlet (Less than $1 at hardware store)
- 2 6-32 screws to assemble outlet
- 4 contact terminal strip ($1.10 at Halted)
- 2 8-32 screws + nuts to attach terminal strip to junction box
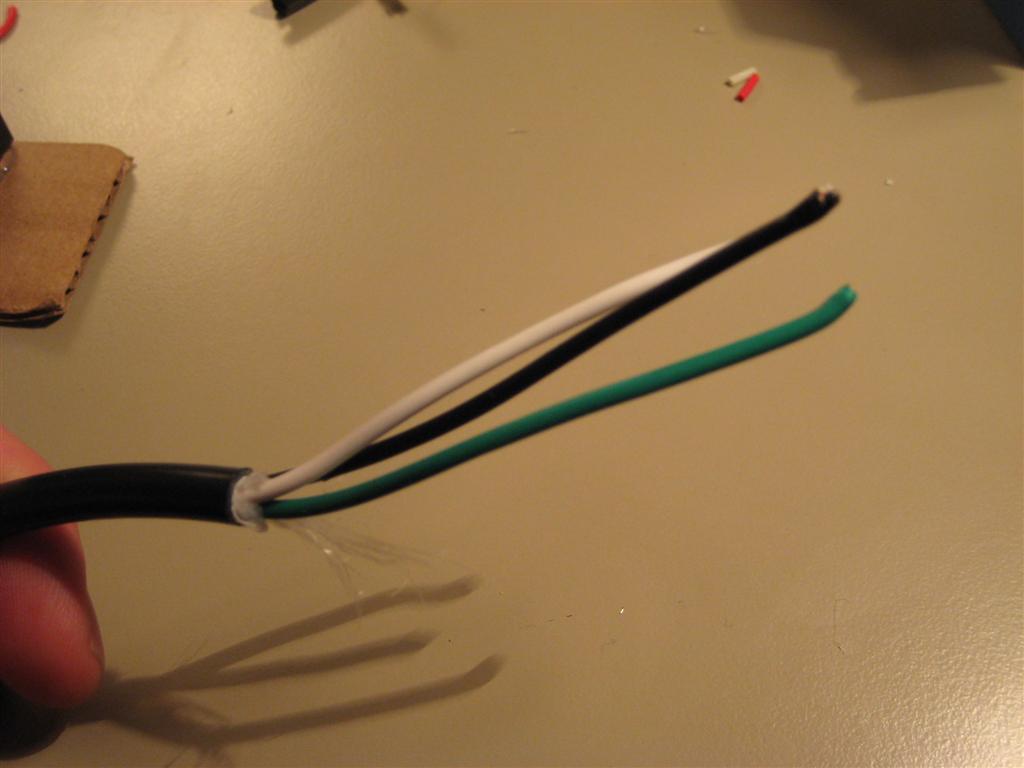
- Old 3 conductor power cable (spare computer cables are perfect for this).
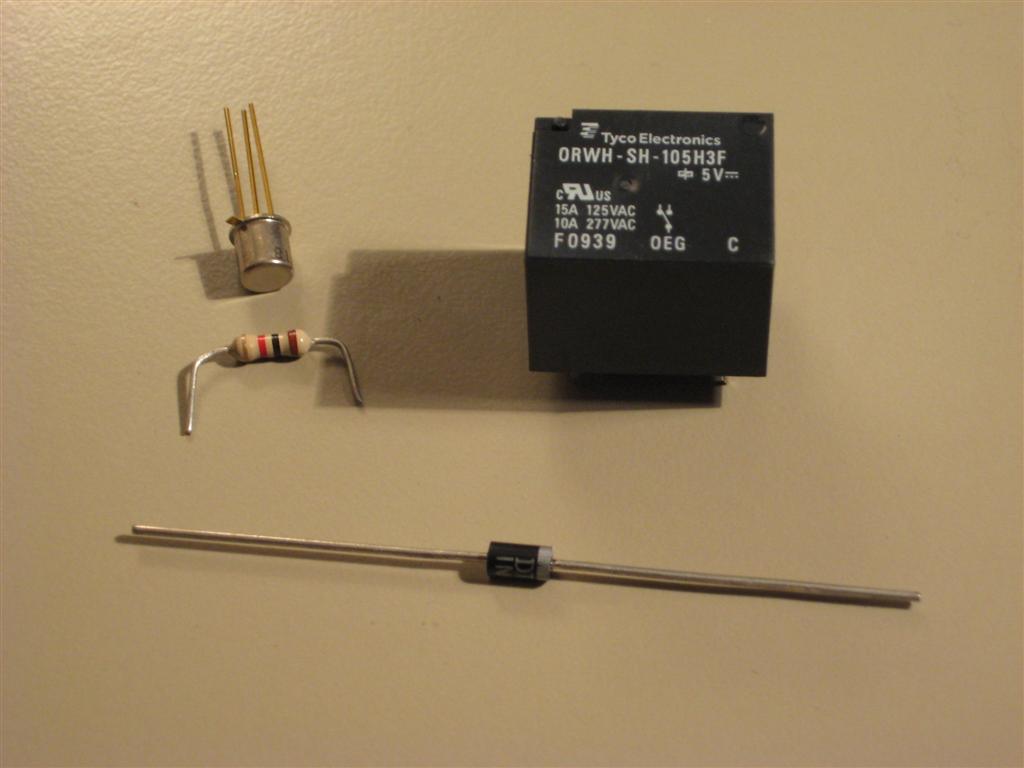
- Relay with a 5V coil, and 250V contacts. ($1.22 at Digikey)
- 1N4002 diode ($0.26 at Digikey). This is not a critical value; Feel free to use any value diode.
- 2N2222 NPN transistor ($0.49 at Digikey). Note that I used one from inventory, which happened to be in a TO-18 case, instead of the more modern TO-92. Don’t worry about it. Even a 2N3904 would work.
- 1k resistor ($0.064 at Digikey)
- 2 pieces heavy gauge (at least AWG14) wire.
First is preparing the outlet and junction box.
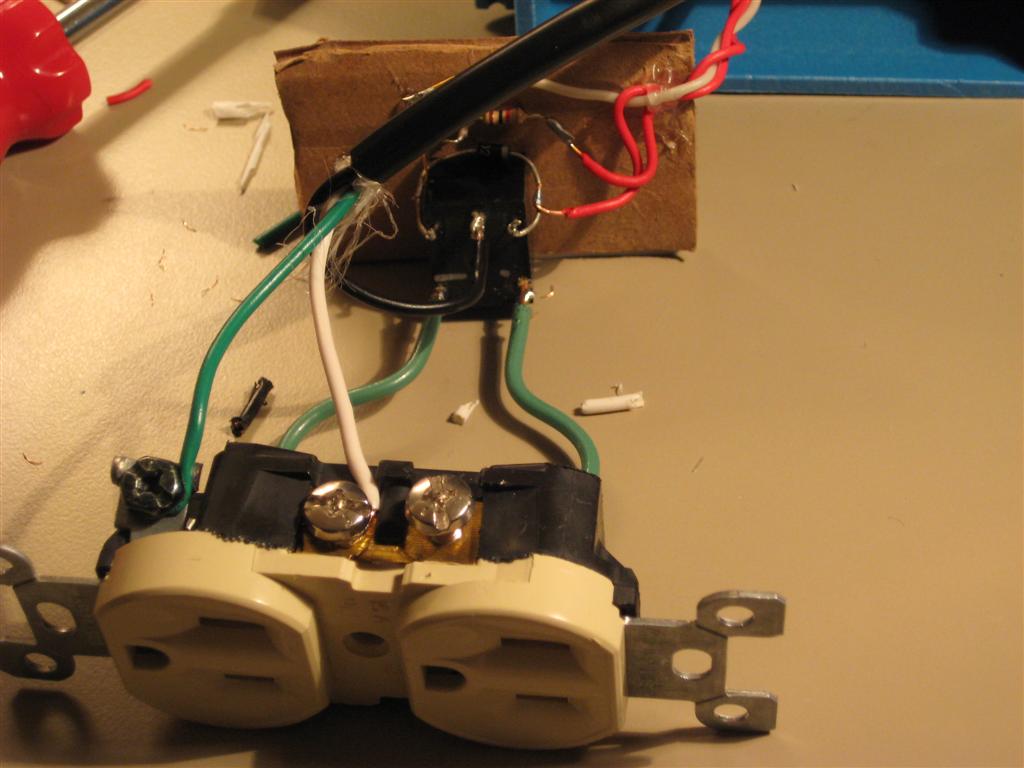
Normally, both plugs in an outlet are tied together, since they’re all on the same circuit. I wanted one of the two outlets to be the inverse of the other, so this had to be fixed. Outlets are designed so that you can just cut a tab between the two screws to electrically separate them. We only need to cut the tab on the hot (brass) side, since they’re still going to share the same neutral.
For the junction box, drill two holes to attach the terminal strip. I used a terminal strip because this is primarily meant for prototyping, so I want strain relief while still being able to easily connect and disconnect it.
And remove one of the plastic tabs on the bottom for the three TTL wires and the 120VAC power cable to come into the box. You can punch it out with a screw driver, or your bare hands, if there is an attractive female watching.
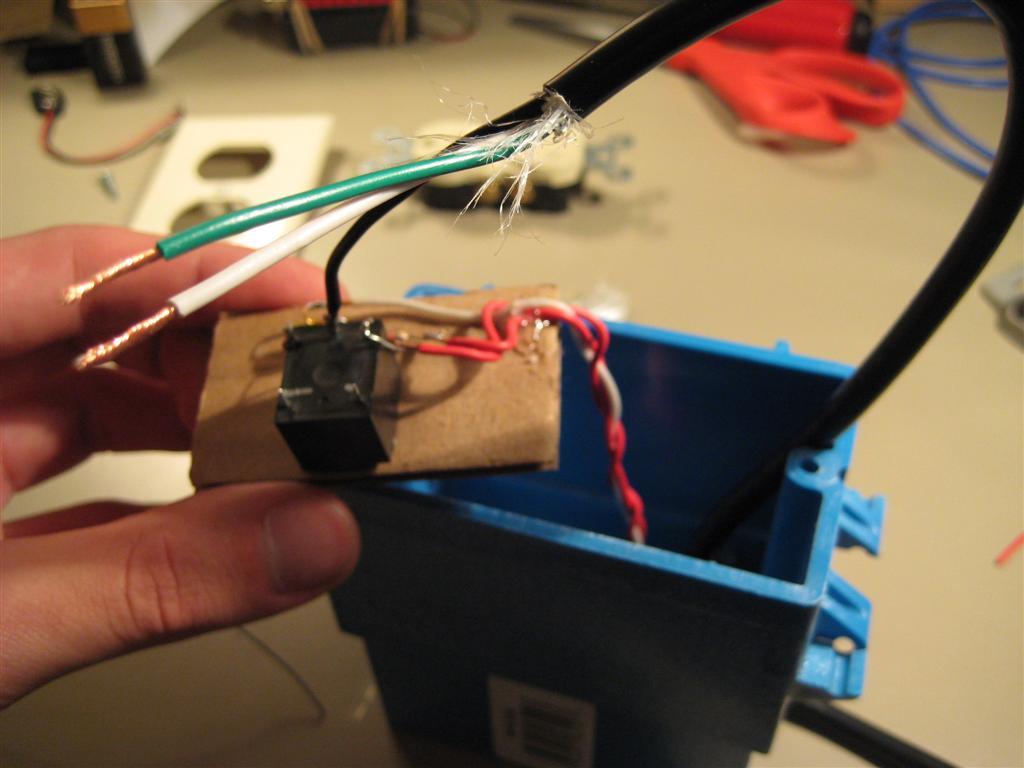
Now fire up your soldering iron and start making some magic. This was my first attempt at dead bug construction, where you glue the parts down upside down and solder them in the air. Using hot-melt glue was probably a bad idea, and I probably should have covered the 5V stuff in something to protect it from the high voltage lines running on top of them… Food for thought…
Cut off a few inches of insulation from the power cable, and wire up the outlet. Be sure to feed the power cable through the junction box before soldering it to the relay!!! (Not that I would do something incredibly stupid like that… honestly…)
Once it’s all wired up, feed it all into the junction box, and screw together the outlet and face plate (Of course, you tested it all before tightening down the screws, right? That’d be pretty silly to close it all up, and then have it not work…). Wire up the terminal strip, and you’re done!
There is quite a few possible uses for this thing. We’ve come up with using it to automatically turn on appliances like a water heater right before your alarm, so that you can wake up to hot water for tea; or flash the lights a few times before turning them on to wake you up in the morning; or even using it to turn off a fan a few hours after you go to sleep during the summer so it doesn’t run all night.