Cutting with a Tablesaw

Another video on woodworking, this time with the big boy of the shop, the tablesaw. I posted all the previous articles in this series back in December, if this seems to be coming from left base here.
To try and avoid the 15 minute long talk about cutting utensils in the drill press video, I’ll talk about your various options as far as blades not in the video.

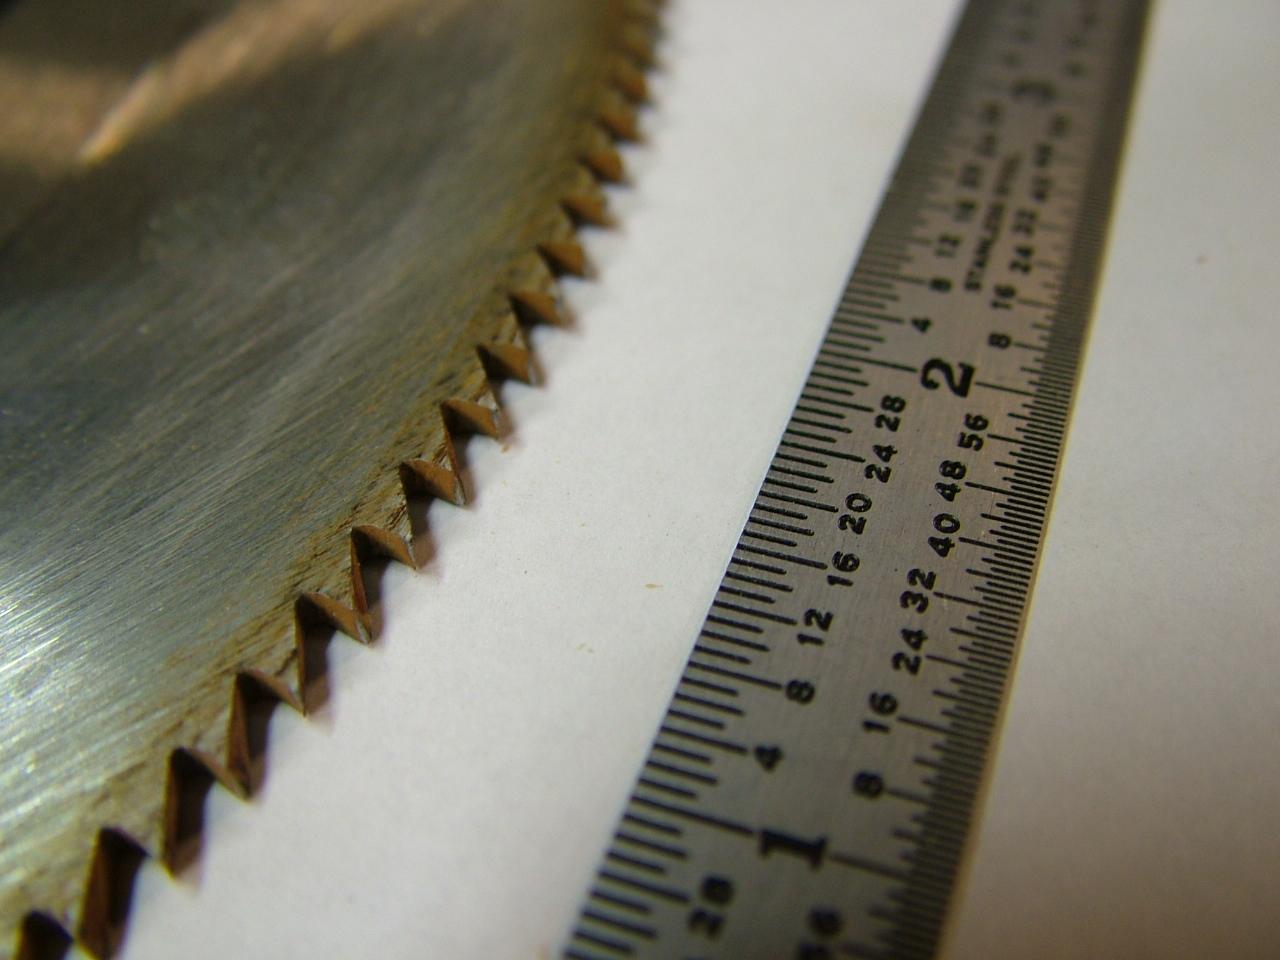
Your first saw blade that you will get free with your table saw is typically a “combination” blade.
If you take a close look at the blades on a combination saw you’ll notice that it has widely-spaced teeth with a slight angle in alternating directions.
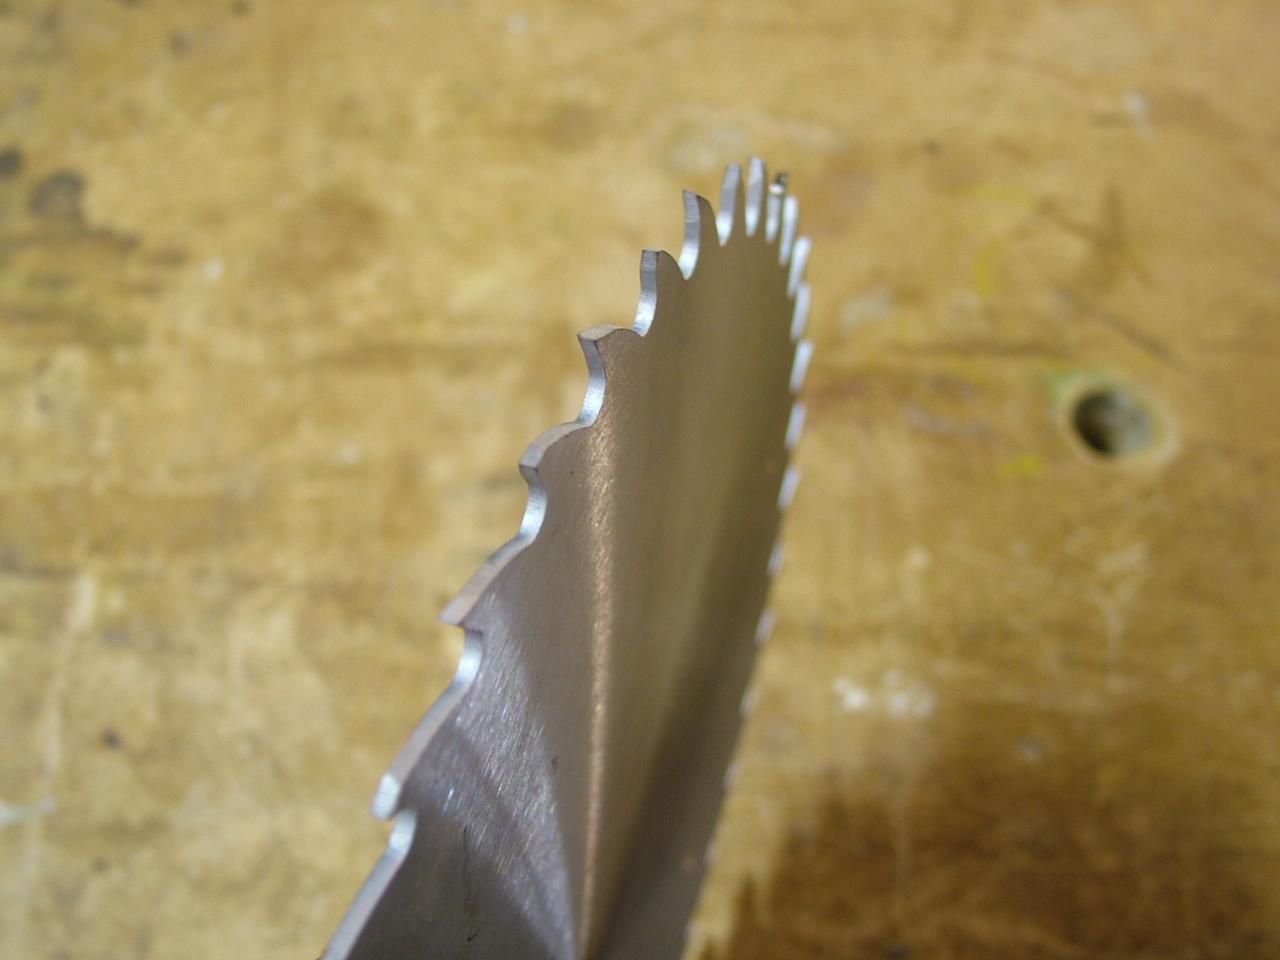
This is because the combination blade is designed for both cross and rip cutting.
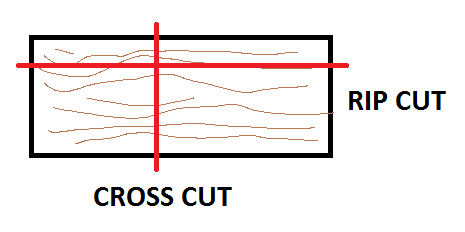
Cross cutting is when you cut perpendicular to the grain, and rip cutting is when you cut parallel to the grain of the wood.
For cross-cut, it’s important to have the alternating angled teeth to help sever the grain cleanly, since the wood grain is fibrous and tends to tear the wood when you try to cut it.
For rip cutting, it’s important to instead have the wide teeth spacing to have a chiseling action as the blade scoops out material.
The combination saw is designed for both of these actions.
The combination blade is designed for both rip and cross cuts, but as you’ll notice that our 20-year-old combination blade is still in pristine condition, it does neither well. The combination blade is a compromise between rip blades and cross cut blades.
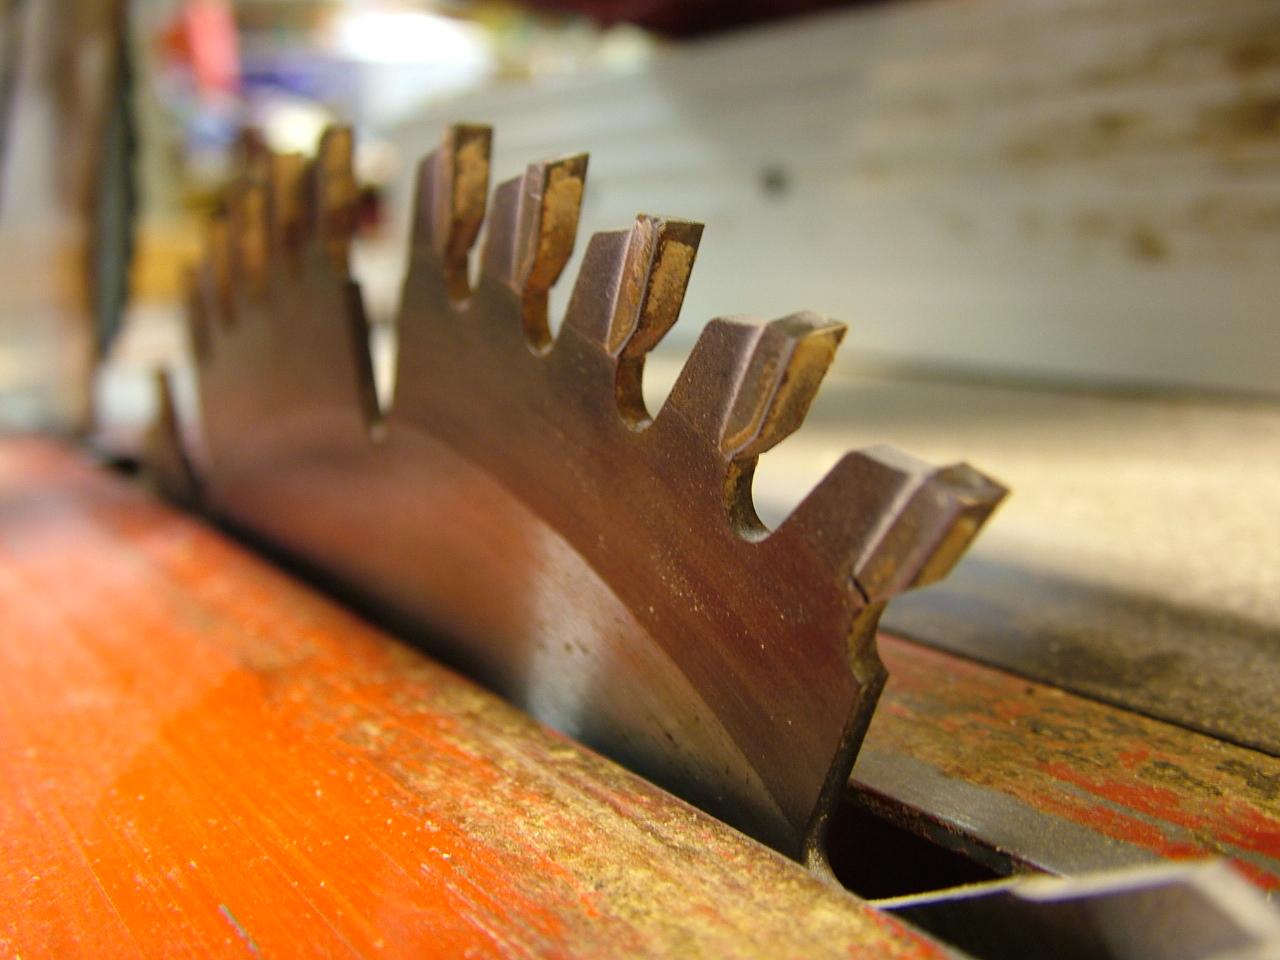
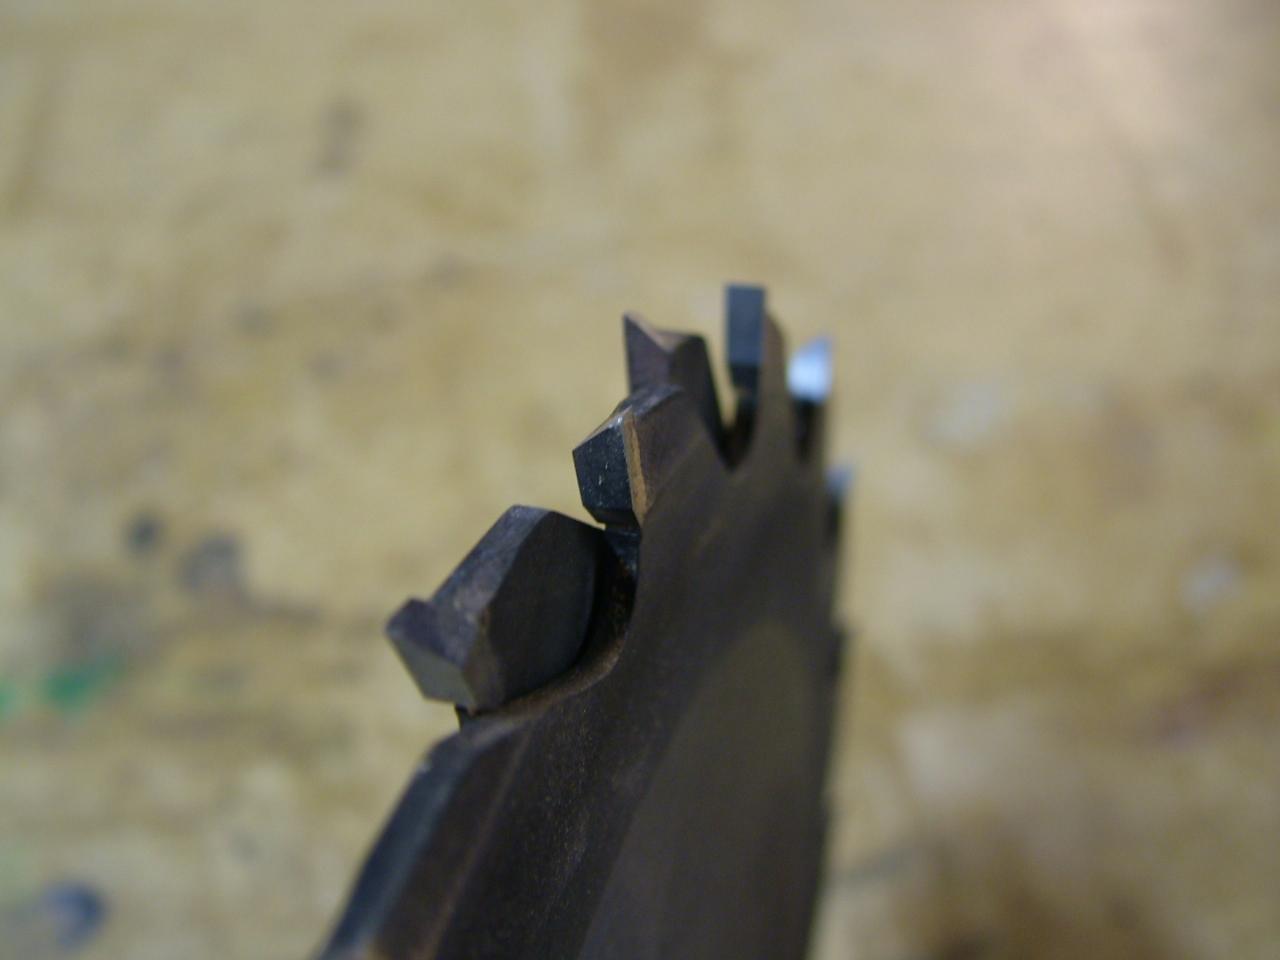
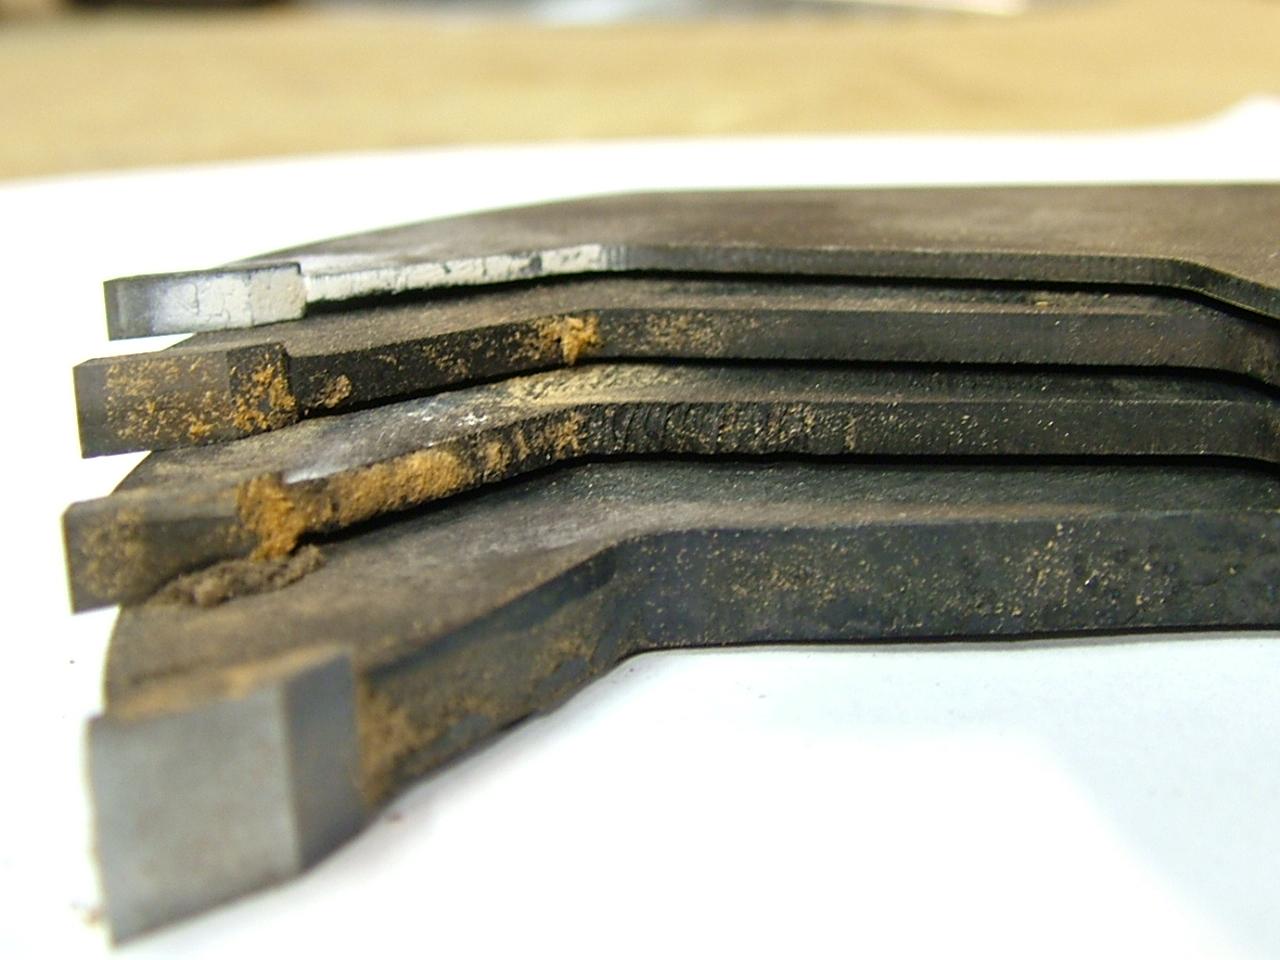
This is what a good rip saw looks like. You’ll notice that this one actually has seen some action in our shop. The primary cutting action is performed by the front blade in the set, which is square. You’ll notice that the second through fourth blades of each cluster are angled, just like you saw in the combination and will see in the cross cut saws; these still help getting a clean cut, even though you’re making a rip cut.
You’ll also notice that this blade has carbide tips, which are the rectangles tipping each tooth. The cost difference between a carbide blade and a simple steel blade is significant, but if you’re doing fine woodworking, carbide is a difference worth its price. On the other hand, if you’re using your tablesaw to hack up the old cherry tree from the backyard for firewood, for all that is mighty, please make sure you’re not using a carbide blade.

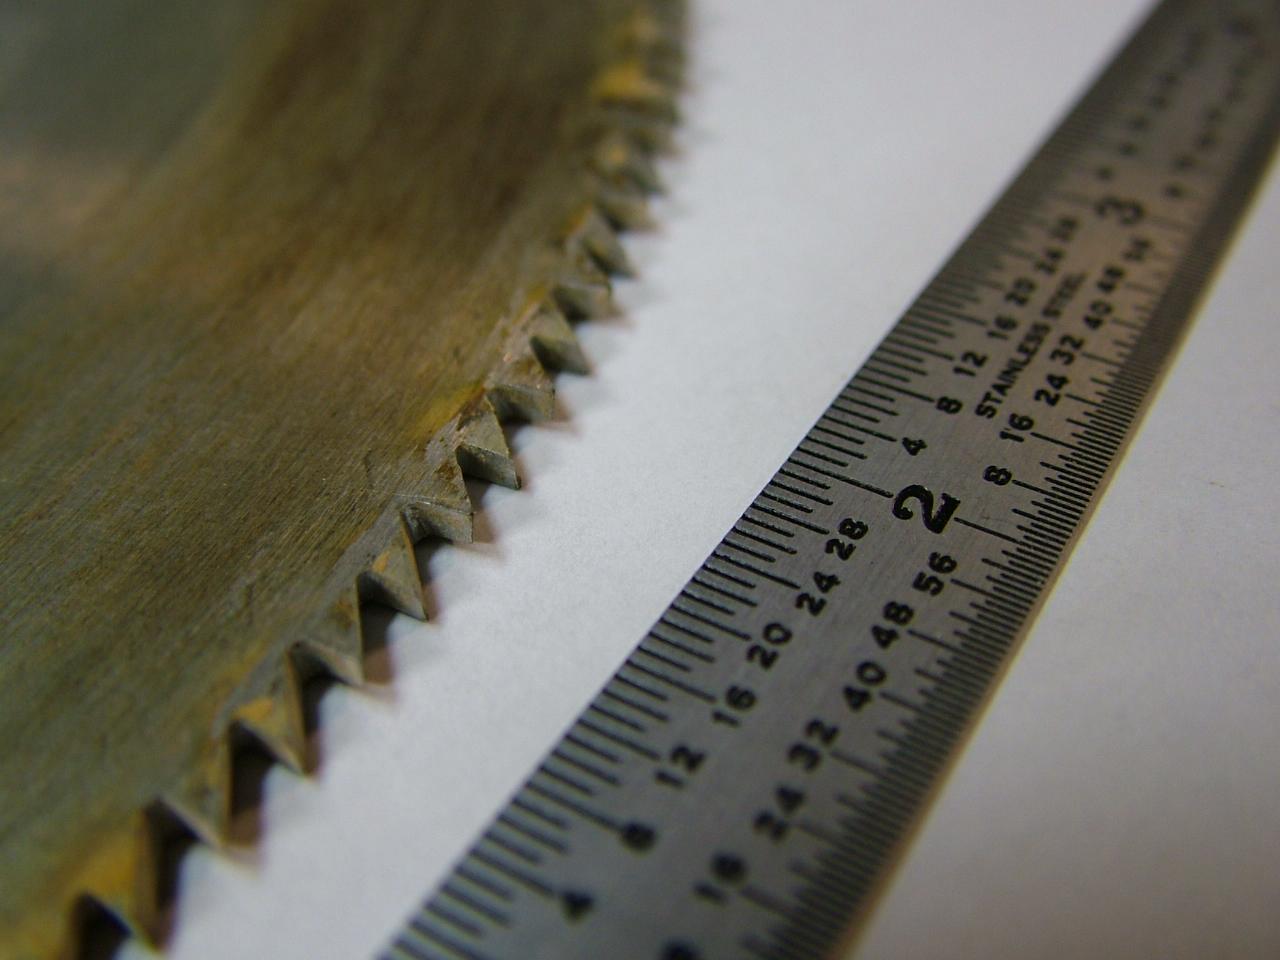
On the opposite side of combination blades from rip is the cross-cut saw. This blade is specifically designed for cutting perpendicular to the grain, which is more the domain of the radial arm saw than the table saw, but if you get 10 inch equipment for both, you can use it on either. The cross-cut saw can be recognized by the fine-spaced teeth angled in alternating directions, which do a very good job of severing the grains as the wood crosses the radius of the saw, but aren’t as good at removing the bulk material you need for rip cutting. Again, the pictured blade is carbide-tipped, which is an easy way to spot a much nicer saw blade. These two carbide saw blades have lasted us decades, so it’s hard for me to say that the investment wasn’t worth it.
The careful reader will then ask about plywood.
Plywood is the very common and cheap building material that, if you stop and really look at it, is actually several very thin layers of wood glued together, with their grains at right angles.
This is great because it means plywood is more isotropic than traditional wood board (it’s more consistent as far as strength in one direction or the other due to the grain), but when you’re cutting plywood, do you use a cross-cut blade, or a rip blade?
You’ll always be cutting the wood half rip and half cross, so what is a man to do?
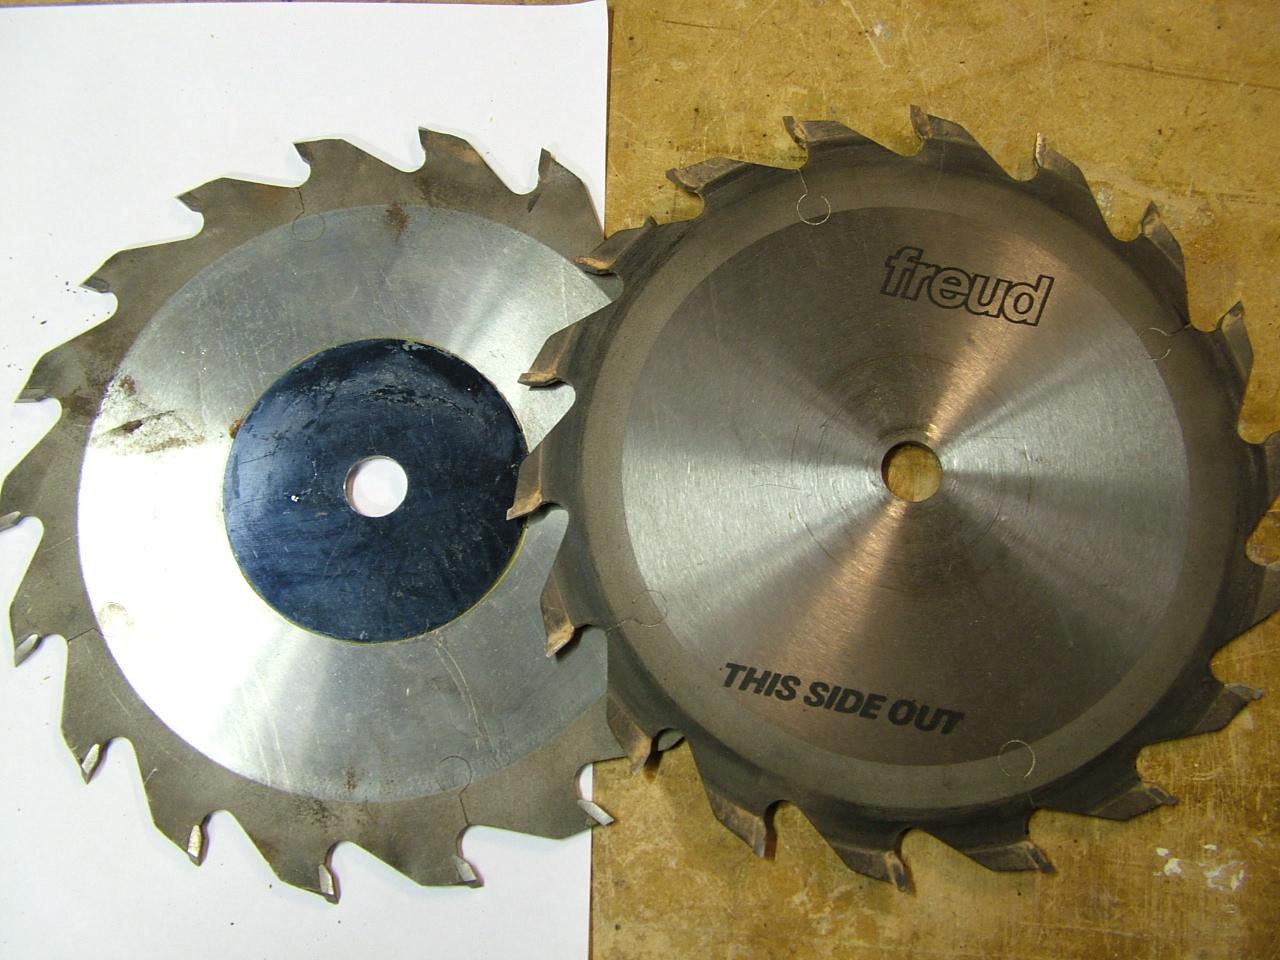
I kid you not, there is plywood saws.
As you’ll notice, these blades are much smaller than anything we’ve looked at so far.
You could say the plywood blade is making the opposite compromise that the combination blade makes; instead of coarse angled teeth, it has very fine chisel teeth.
This suites it well for cutting plywood, since plywood doesn’t tend to form large chips like ripping or have the fibrous consistency which begets cross-cuts, but instead forms many small chips which need to be scooped away quickly.
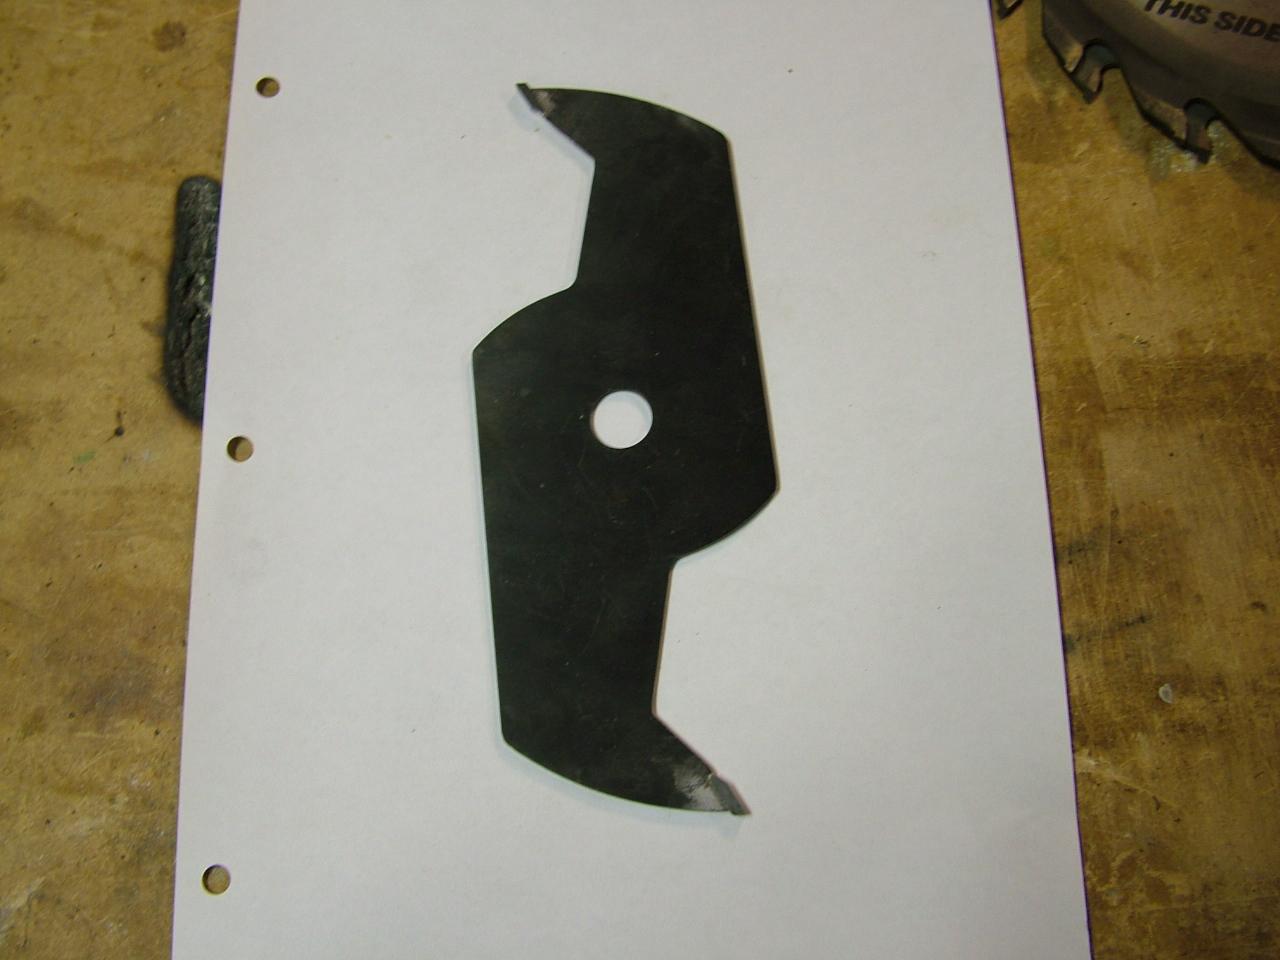
You can actually take this argument a step further, to what’s called a veneer saw.
Wood veneer is the very thin layers of wood which are glued together to form plywood and the wood grain surface of particle-board desks and shelves.
The veneer saw’s teeth are almost exactly the same size as the plywood saw’s, but you will notice that the side of the saw has an angled lap to it, which helps to prevent tear-out or chipping when you are trying to cut the extremely thin veneer (usually <1/8 inch).
This lap, unfortunately, only goes in about an inch of the radius of the saw, so using this blade to try and cut thicker material (or even plywood) isn’t advised., since the saw gets quite a big thicker above this lapped radius, and you really shouldn’t be using such a specialized saw for anything else anyways.
The last saw blade of interest isn’t actually a single saw blade, but is what’s called a dado set.
Dado sets are a series of blades of different thicknesses which can be combined to form a single cutting face of variable width.
This is used to cut dados and grooves in wood, which are the cuts part-way through material at joints to act as a recess to hold perpendicular boards.
The classic application of a dado is the joints in a bookshelf (before Ikea came in and replaced every wood joint with pegs and dowel nuts) where the shelves insert into the side panels.
The problem is that every dado is going to need to be a slightly different width.
This is where the dado “set” comes to play.
At it’s minimum, it has two 1/8” blades, which appear somewhat like a high quality combination blade split onto two discs (this is such that you can also cut grooves with it, which are dados but parallel to the grain).
The second part of the dado set is several S blades, which you can install between the two main blades, to move them apart and to remove the center material of the dado.
You’ll notice that these S blades only have two teeth on them, in sharp contrast to every other saw blade which have “hella” teeth.
This is because the middle of the dado isn’t a particularly important surface, since it will have little to do with the final fit of the boards, and will be covered by the perpendicular board once assembled, so rough-cutting this inner face is fine.
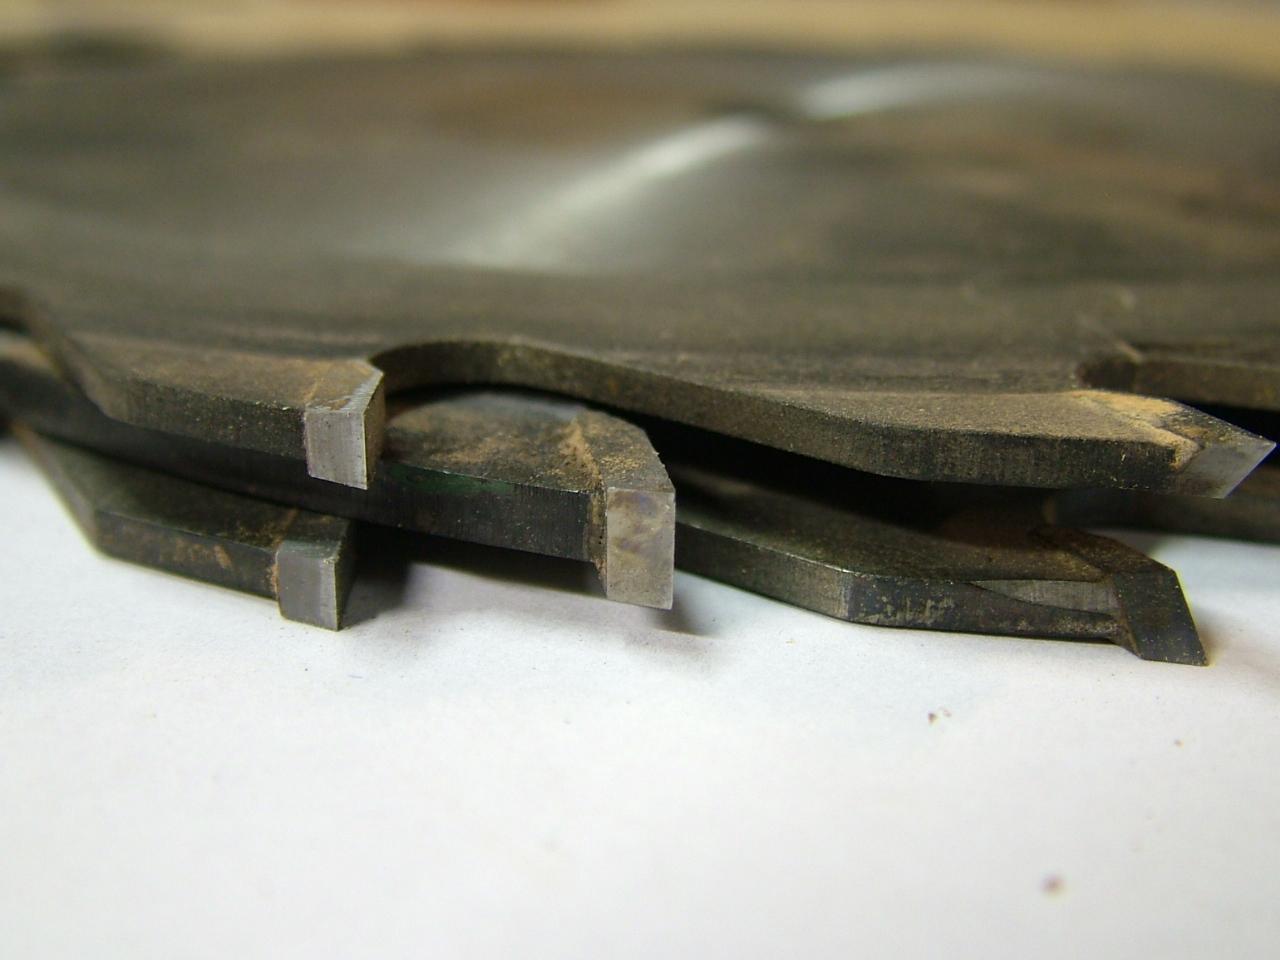
By sandwiching the S blade between the outer two, you get a variable width blade to cut the exact width dado you need.
Notice that the two external blades have a very definite inside and outside, which is important since the angled teeth need to be attacking the finished surface, not retreating from it.
My set happens to include a 1/16”, two 1/8”, and a 1/4” S blade, meaning I can set it up for 1/16” increments from 1/4” to nearly 1” by swapping in whichever blades I’d need to meet my needs.

But the dado set has more; it comes with five precision spacers to allow you to widen the dado in increments less than 1/16”.
Using a variable number of these spacers and S blades, you can pretty much cut a snug-fit dado for any thickness of board.

If you’re using multiple spacers, you would want to try and spread them between S blades if possible, but even if you gauge out more than the overlap of the carbide tips, you’ll only be left with a sliver which you can just snap off (or it will likely break off during the cut) and you can sand it down.
So that’s it as far as my collection of saw blades. Again, please don’t think that this video and post are enough to learn how to use a table saw, so make sure to read your owner’s manual, and get professional training if available.